Whitelisting simulated phishing in Exchange
This guide is intended for administrators to allow simulated phishing from Secure Practice.
Instructions in this manual take place in Exchange Admin Center (EAC), and you need the role as Exchange Administrator to be able to perform the specified tasks.
Do you prefer PowerShell? Click to see the scripted version of this guide
First, connect with PowerShell to a new admin session in Exchange.
Then, after authenticating, create a new transport rule with the single command below:
1New-TransportRule SecurePracticeBypassJunk -SenderIpRanges "207.154.247.120","206.189.251.203","159.89.9.35","92.62.34.213" -SetSCL "-1" -SetHeaderName "X-MS-Exchange-Organization-BypassClutter" -SetHeaderValue "true"Finally, review your overall rule priorities to ensure that there are not any other custom rules blocking the simulated phishing emails before they reach our whitelist rules.
1Get-TransportRuleIf adjustments are needed, please see the official documentation referenced above, or use the Exchange Admin Center as shown below to re-order rules through a web portal.
And congratulations, we are all done with whitelisting in Exchange!
PS! If at some point you need a script to remove our rules again, the following will work:
1Remove-TransportRule -Identity "SecurePracticeBypassJunk" -Confirm:$falseIn the main menu, click on «protection», and in the next screen choose «connection filter» from the horizontal navigation at the top:
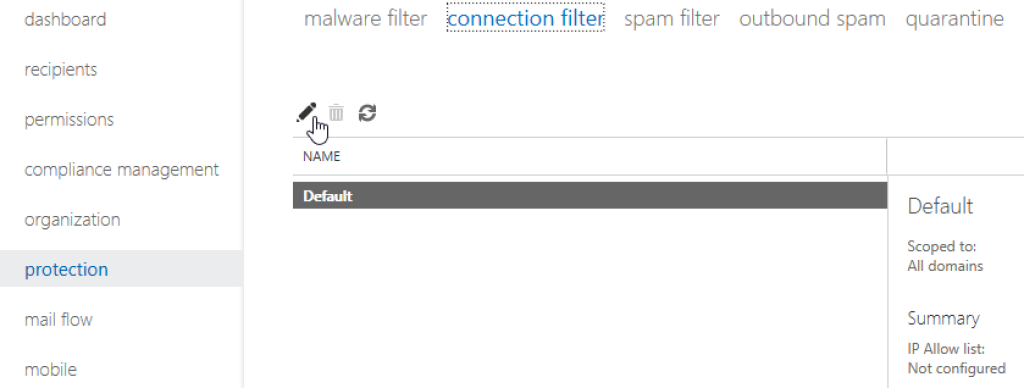
Select the profile «Default» (or similar), and click the pencil icon to open a dialog where this profile can be edited.
In the pop-up window, choose «connection filtering» from the menu, and on the next screen find the list «IP allow list» at the top:
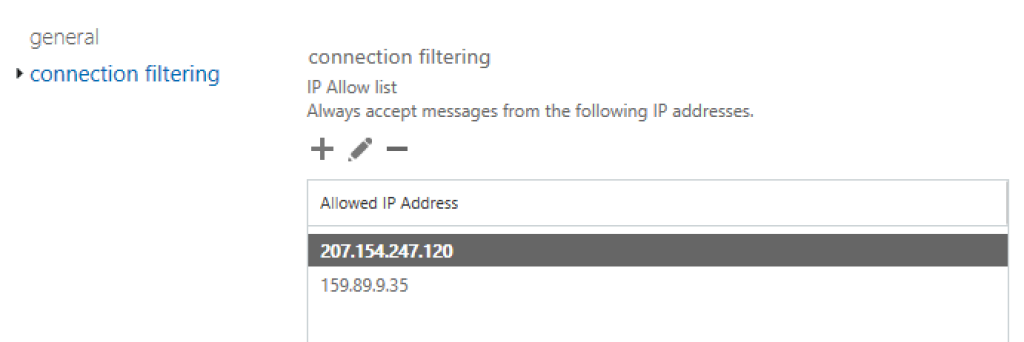
Click on the plus button, and in the dialog which follows, enter (by two separate actions) the following IP adresses for approval:
45.154.232.29
92.62.34.213
207.154.247.120 (to be discontinued in October 2025)
159.89.9.35 (not used for simulated phishing, but for any other service emails. To be discontinued in October 2025)
This will guarantee that the Exchange spam filter will not block the email, however the Outlook client may still move emails to the junk folder, so keep on reading.
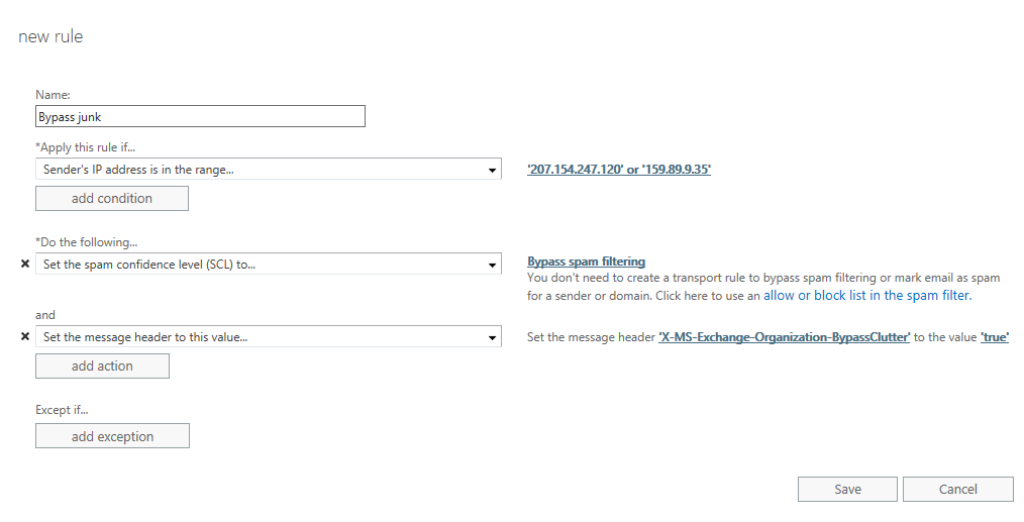
To avoid this, go to click on «mail flow» in the main menu, click on the plus button, and select «Bypass spam filtering…».
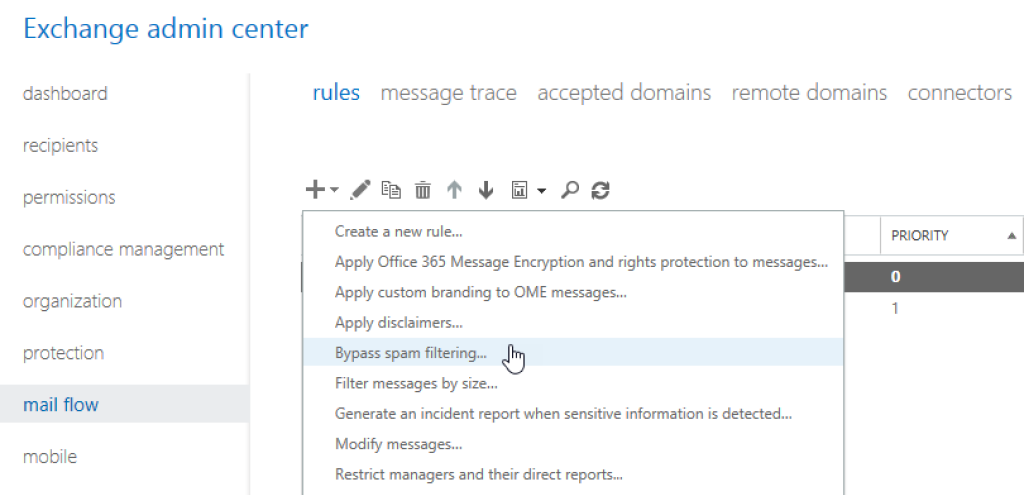
Below «Apply this rule if…», choose «The sender…» and «IP address is in any of these ranges or exactly matches».
A new dialog will allow you to specify IP address ranges, so add the same addresses as specified above in this guide.
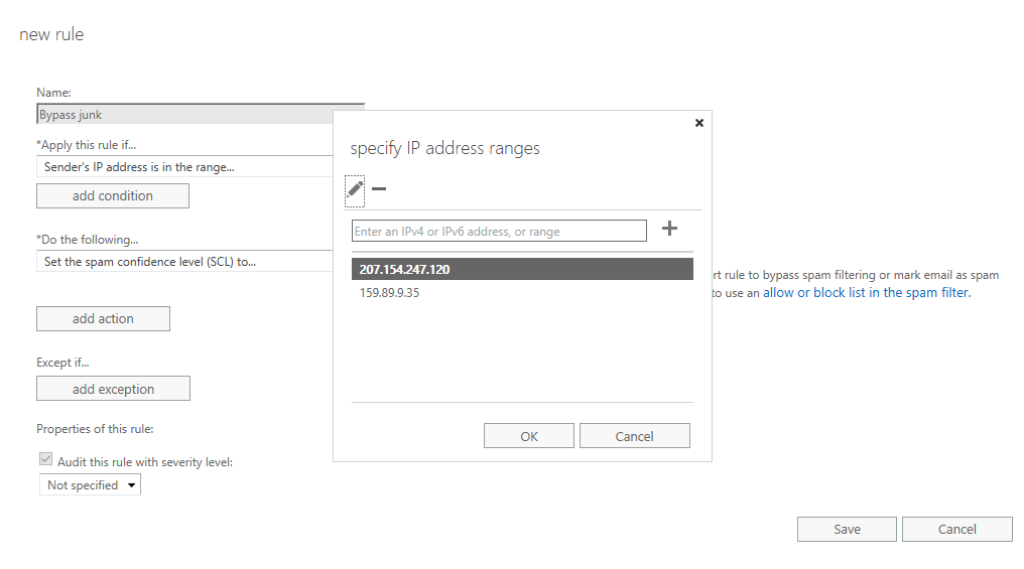
In addition, we want to let Outlook know that the email should be included in the focused inbox, instead of clutter. Click «Add action», «Modify the message properties…» and finally «set a message header».
Input «X-MS-Exchange-Organization-BypassClutter» as the message header, and «true» as the header value. Note that both inputs are case sensitive.
For any of the whitelist actions, we recommend that you try sending a simulated phishing email to yourself and possibly a few colleagues before going live with a full campaign. You may also need to wait a few minutes for any such change to come into action.