Single sign-on with SAML
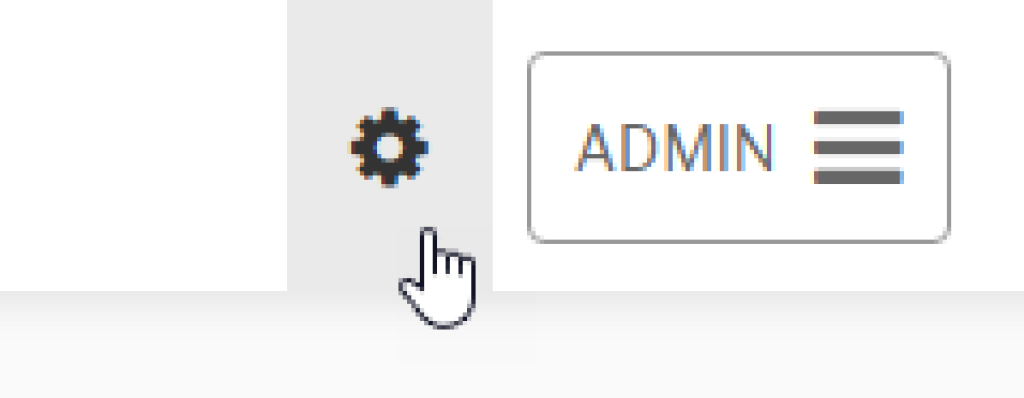
In the Secure Practice customer portal, click the «Settings» button in the top right corner, and navigate to the «SECURITY» tab at the top.
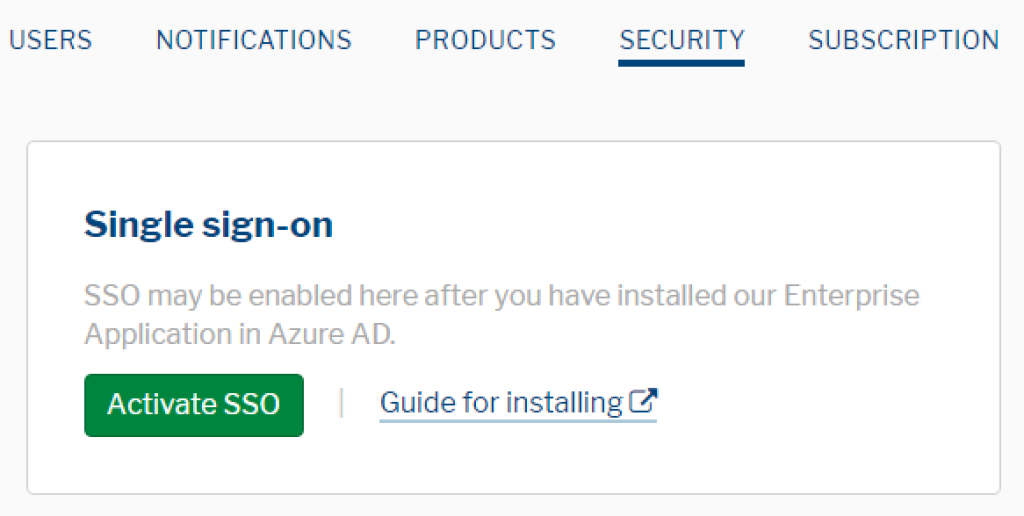
Then, locate the «Single sign-on» section, and click «Activate SSO»:
Depending on your IdP, the following steps may differ. While we have illustrated the IdP setup with Azure AD screenshots, the same or similar principles apply if you are configuring SSO with other IdPs, such as Google Workspace, Okta or SimpleSAMLphp.
Please check out your IdP for guidance on configuring SAML based SSO on their side.
After completing our guide on enabling automatic user sync, you may already have a Secure Practice enterprise application in your Entra ID (previously Azure AD) instance.
You can find it in the Entra ID Admin Portal, in «Enterprise Applications».
Don’t have an enterprise application in Entra ID already?
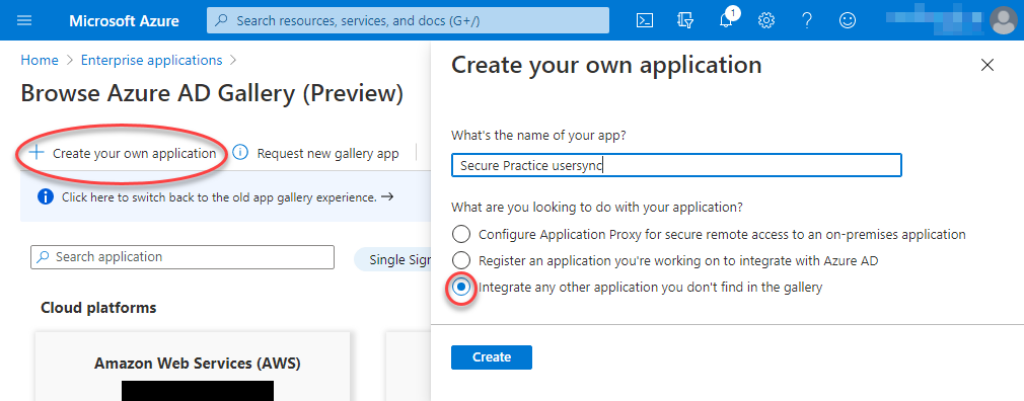
Simply create another enterprise application in your directory. Learn more
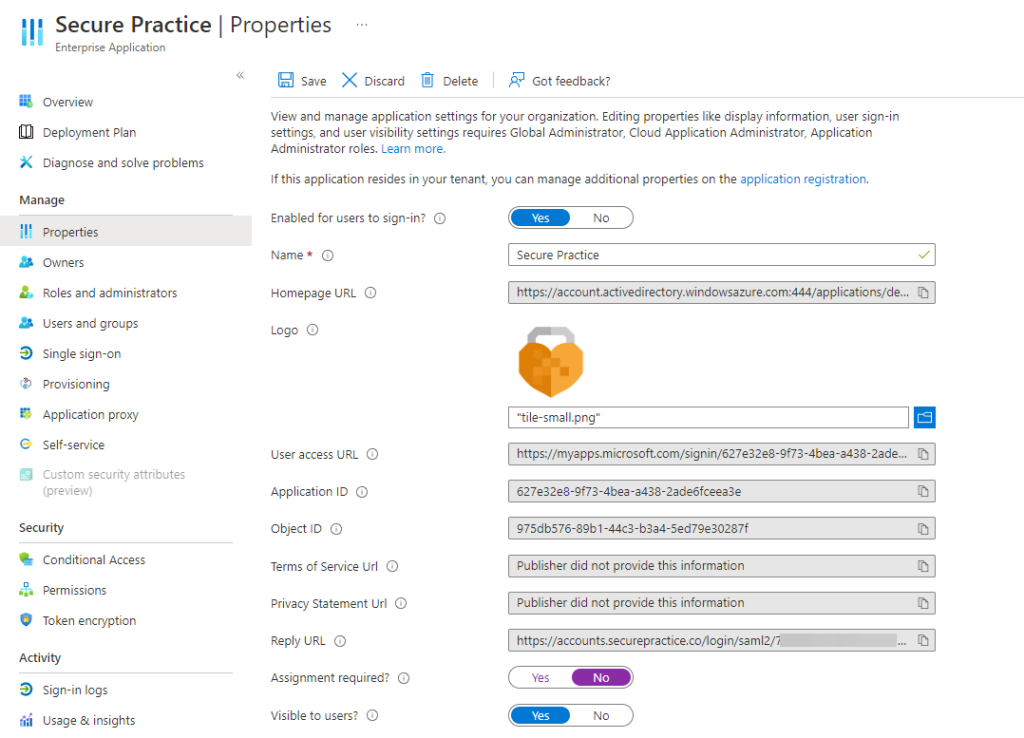
For Entra ID enterprise applications, enable it for users to sign-in, and optionally to be visible.
You can also upload our icon: https://securepractice.co/images/gfx/logo-sq.png
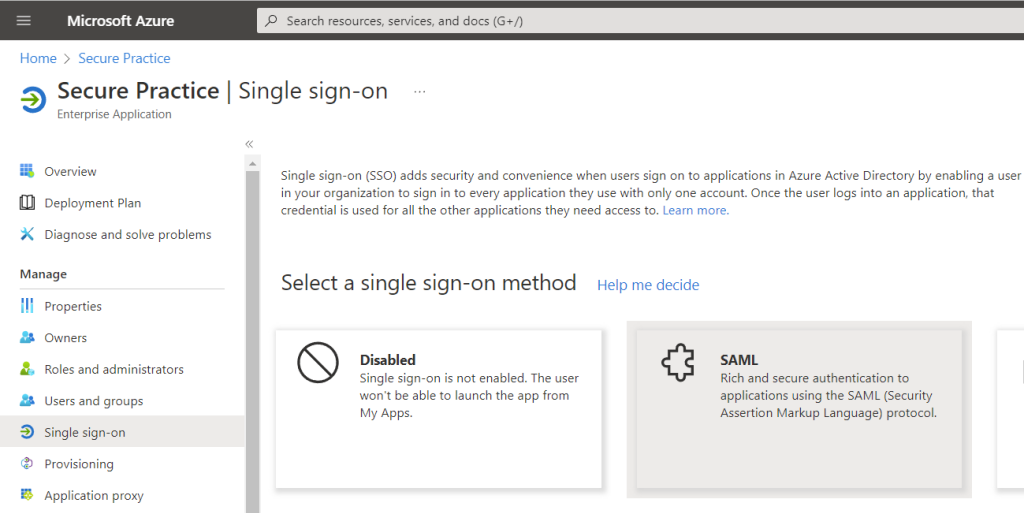
In Azure AD, proceed to «Single sign-on» in the menu, and select SAML as your method:
Next, we can set up the necessary integration points for our identity provider (IdP) and service provider (which is Secure Practice, for the purpose of this guide).
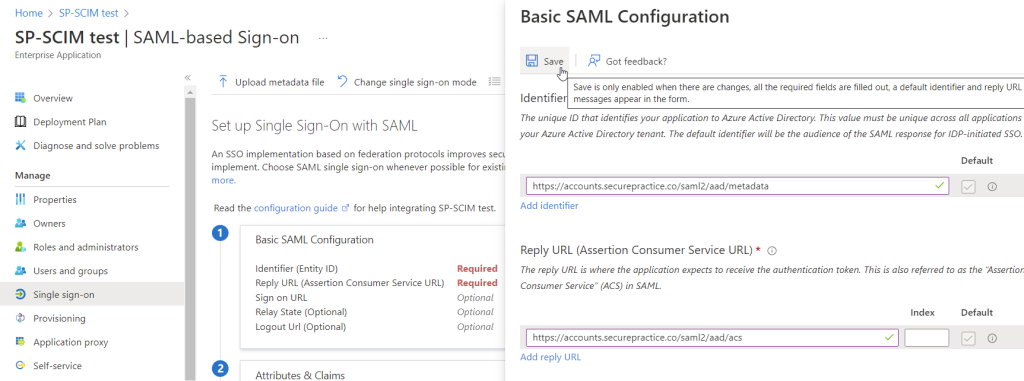
With Azure AD, we first need a couple of placeholder values for the basic SAML configuration:
Identifier: https://accounts.securepractice.co/saml2/aad/metadata
Reply URL: https://accounts.securepractice.co/saml2/aad/acs
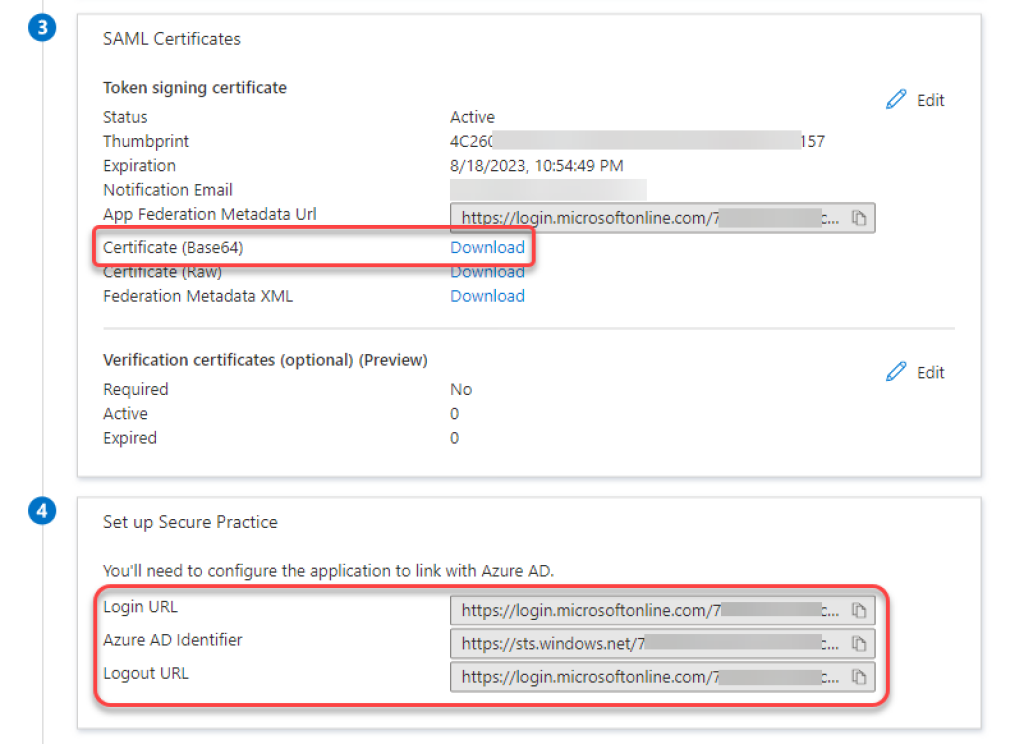
This will unlock our next step, which is to obtain a SAML certificate from our IdP:
Select Certificate (Base64) version and download it to your device.
Open the downloaded certificate file with a text editor to view and copy its contents.
At this point, we are ready to proceed with configuration in the Secure Practice customer portal.
Paste your X.509 Certificate below «Advanced settings» in your SSO settings.
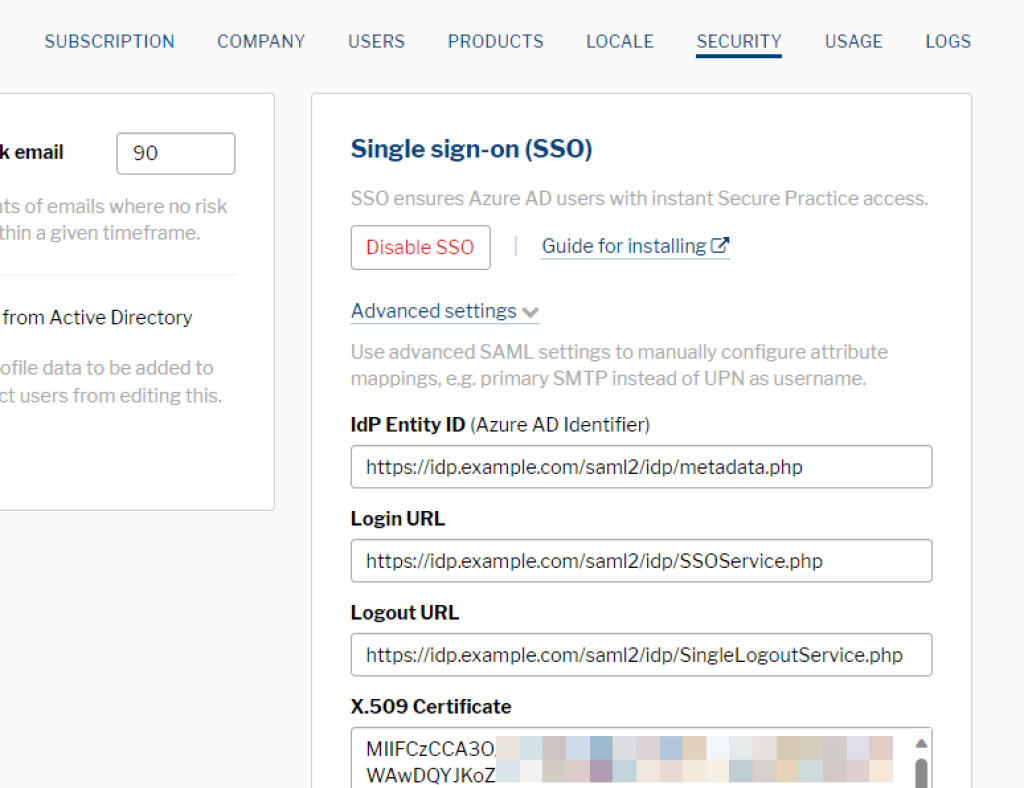
Proceed with adding IdP Entity ID, Login URL and Logout URL (optional) from your IdP.
Upon successfully saving your advanced SSO configuration, you will be presented with actual values for Entity ID and Assertion Consumer Service URL, to be used with your IdP:
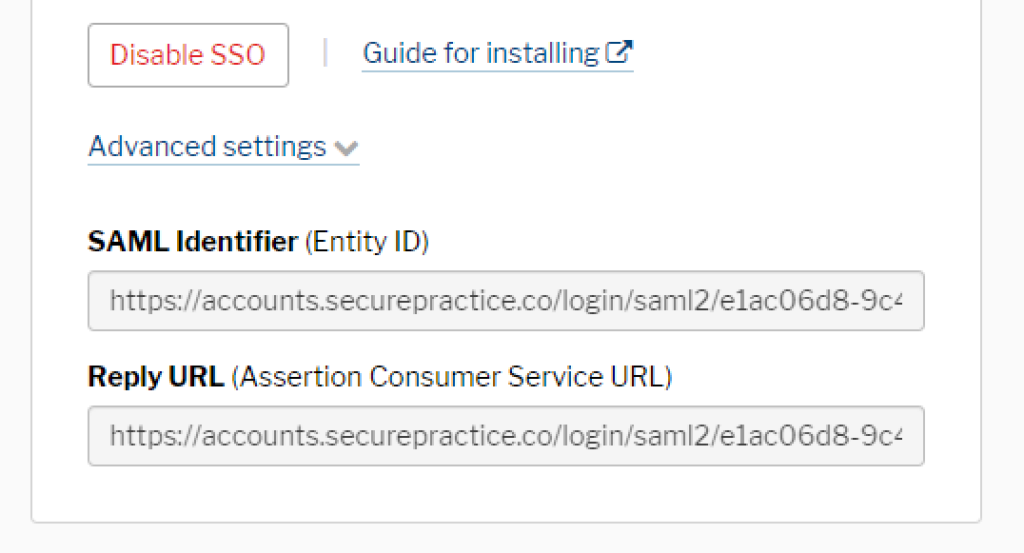
Copy these values into your IdP configuration, replacing the placeholder values we inserted at the beginning of this guide. Notice how both of these URLs are unique to you as a customer, as they include a unique UUID for sending login requests and responses to the right destinations.
Please note again, unless Azure AD is used, we may need to assist you with this UUID.
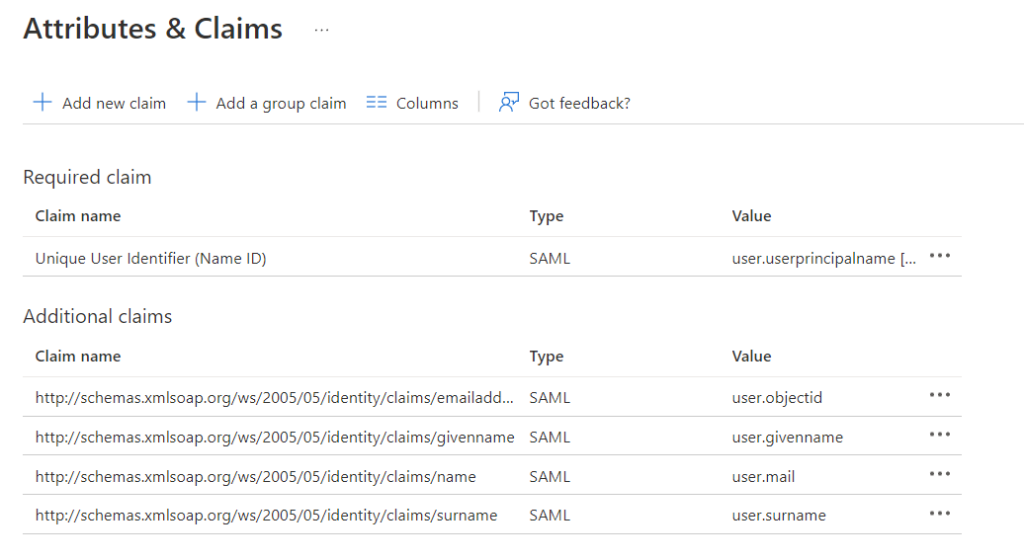
Finally, ensure that the proper data fields are included and associated with each user who successfully completes the SSO flow via your IdP.
In Azure AD, find the «Attributes & Claims» section, and click «Edit»:
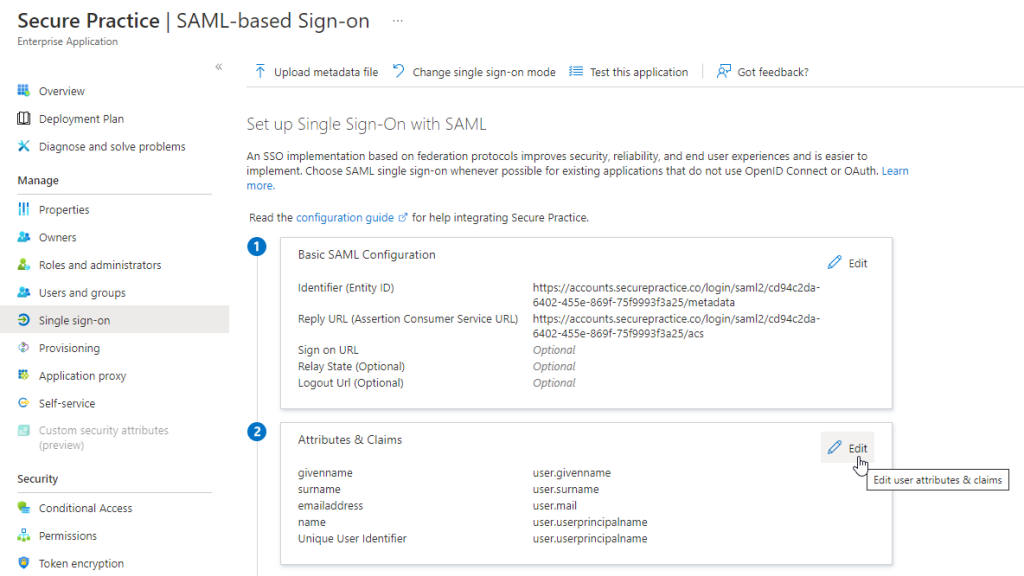
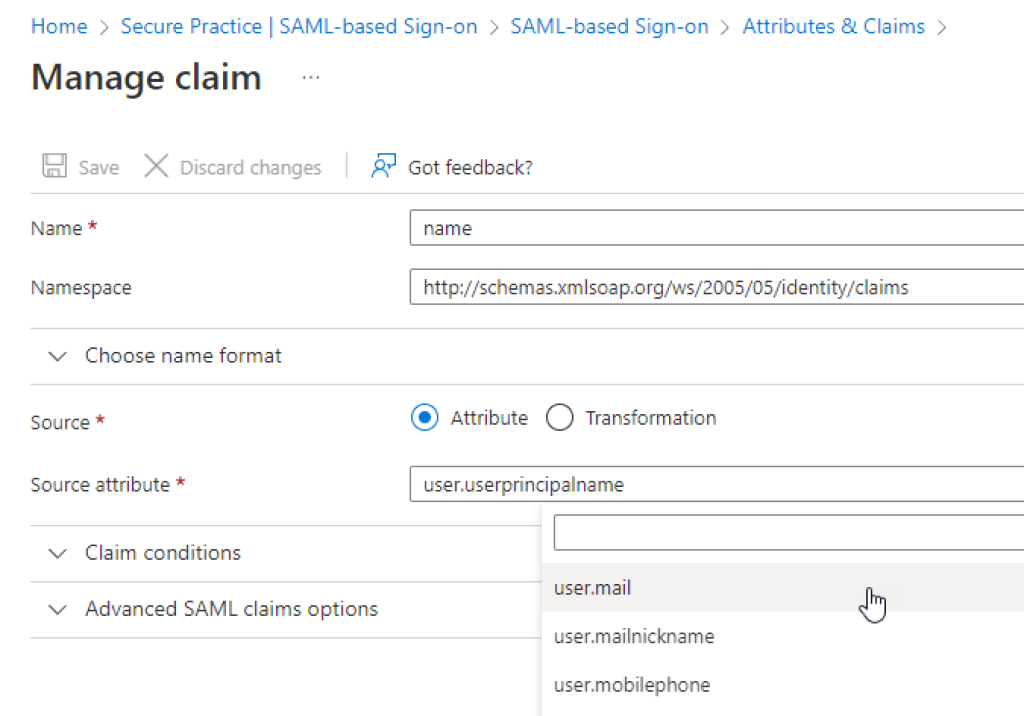
To ensure compatibility with data used in the MailRisk native SSO mechanism via Exchange, please use «user.mail» in all places where «user.userprincipalname» is otherwise used.
An encrypted copy of user data may be stored in our accounts service, depending on customer configuration, and in line with the data processing agreement. The configuration of single sign-on with Azure AD gives Secure Practice no further access to your organization's directory, apart from the relevant user data when an actual sign-in takes place, based on user interaction.
We are happy to answer any compliance or data protection related questions you may have.