Install MailRisk in Exchange
Go to Exchange Admin Center and log in with your administrator account.
In the admin center menu, click «Organization».
In the upper menu bar, you now find the option «Add-ins».
Click the plus button above the add-ins list, and then «Add from file»
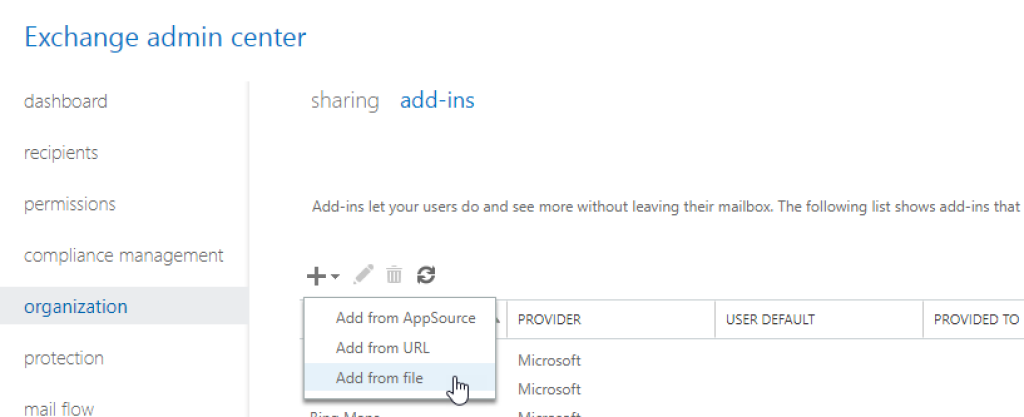
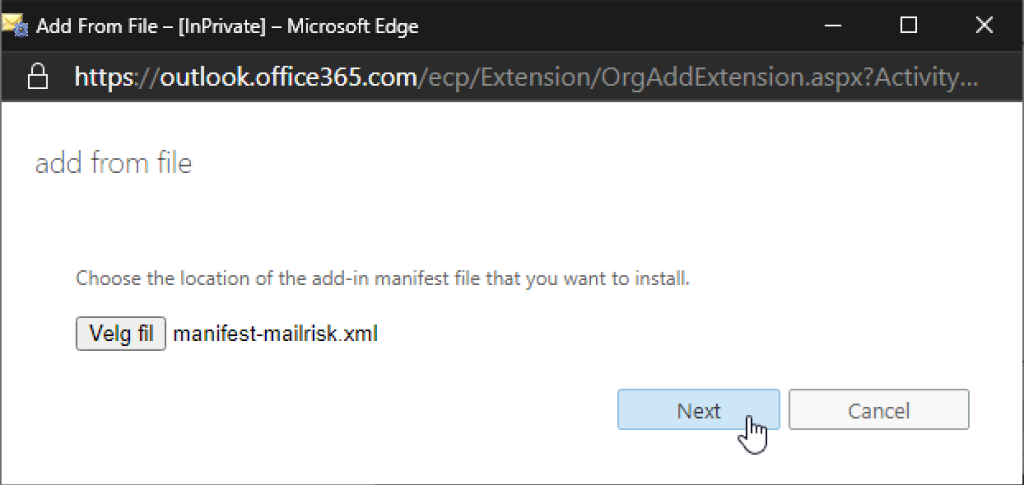
The next step requires you to upload an XML manifest file, which describes the MailRisk add-in to Exchange and Outlook, from your local hard drive.
To obtain the required manifest-file, go to the Secure Practice customer portal https://manage.securepractice.co, and click «Download manifest.xml».
To activate the button immediately for all users in your organization, click the pencil button when MailRisk has been selected in the add-ins list.
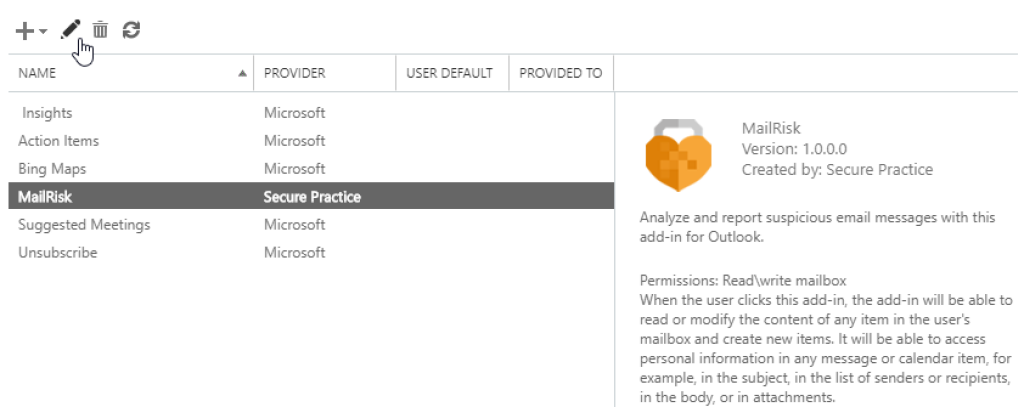
To activate the button immediately for all users in your organization, click the pencil button when MailRisk has been selected in the add-ins list.
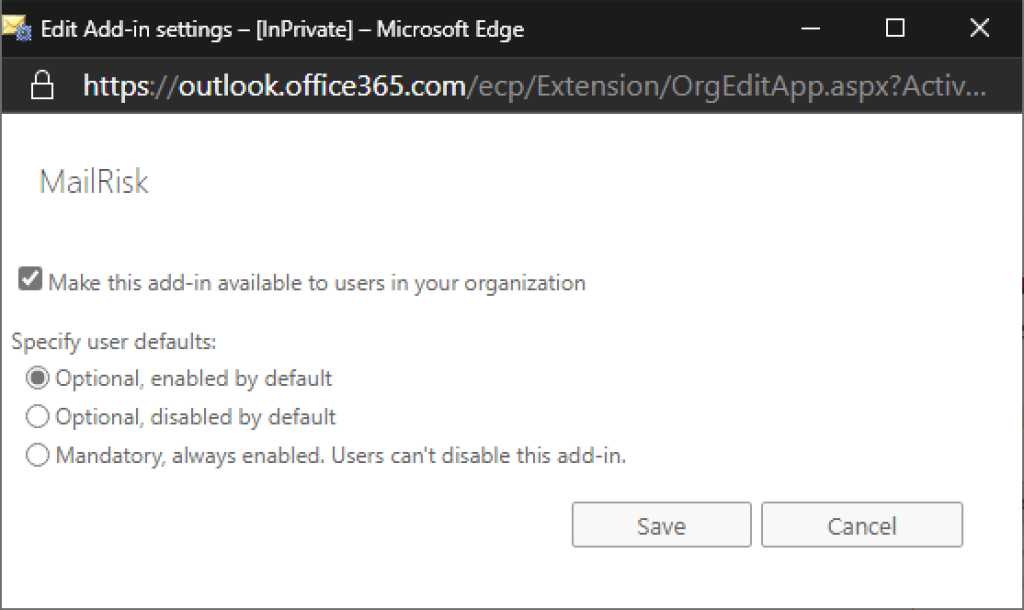
Then, select «Optional, activated as default» as the end-user visibility setting.
Finally, you may also want to whitelist our email servers to ensure our service emails and simulated phishing emails are getting through to your organization's users.
Need any assistance to get started? Please contact support for help!
Distribution to a group
It is also possible to distribute the button to a limited group of users. In Exchange 2013 and 2016, this must be done via PowerShell, and an AD security group with your users is required.
Note that group distribution via PowerShell is bound to several limitations
Distribution is only allowed to non-nested groups, i.e. any group you specify cannot include any other groups, only users.
Exchange limits the number of members in groups to a maximum of 1000 users.
Groups only form the basis for the PowerShell command below, and will not auto-update any group memberships when they change. Therefore, the command must be re-run upon any change in such memberships in your organization.
Therefore, we only recommended group based distribution for limited trial deployments.
In the previous step for distribution, choose instead «Optional, deactivated as default».
Then, you will need to know the application ID for the add-in to be distributed, and this is found near the top of the XML manifest file for MailRisk (see illustration below):
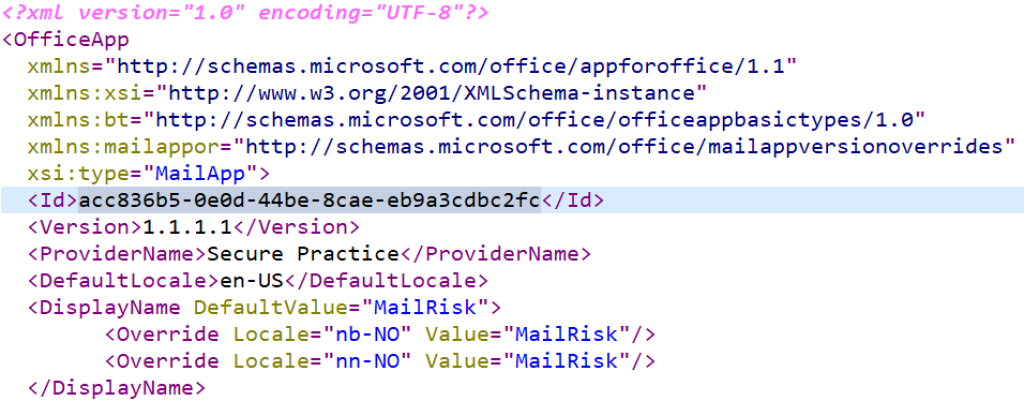
Log in via PowerShell, and run the following command, where «MailRiskGrp» is replaced with the AD group you would like to enable the button for:
1$a = Get-DistributionGroupMember MailRiskGrp2 3Set-app acc836b5-0e0d-44be-8cae-eb9a3cdbc2fc -Organizationadd-in -ProvidedTo SpecificUsers -UserList $a.Identity -DefaultStateForUser EnabledBy the power of this command, distribution is set to activated as default, but only for the users in the given group at the time when the command is run. For the remainder of users, the setting from the earlier step will still apply.