Synchronize users and groups from Entra ID
To obtain the required API key/secret pair, go to the Secure Practice customer portal https://manage.securepractice.co and navigate to security settings:
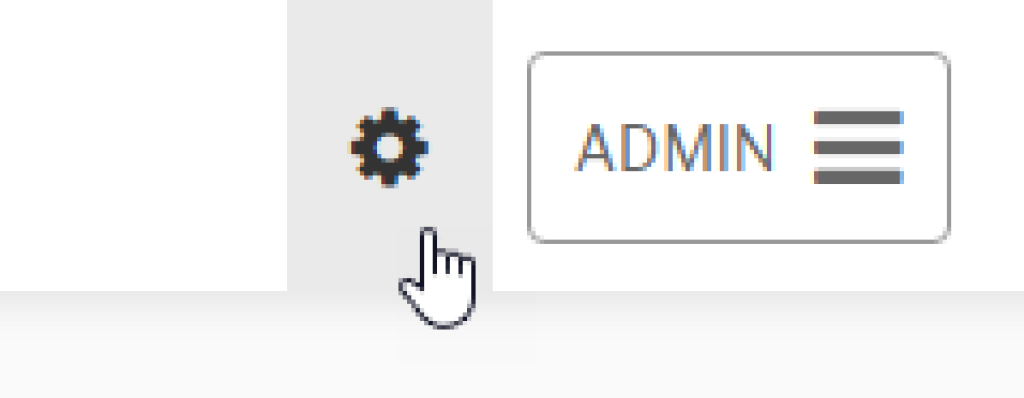
Click the «Settings» button in the top right corner, and navigate to the «SECURITY» tab.
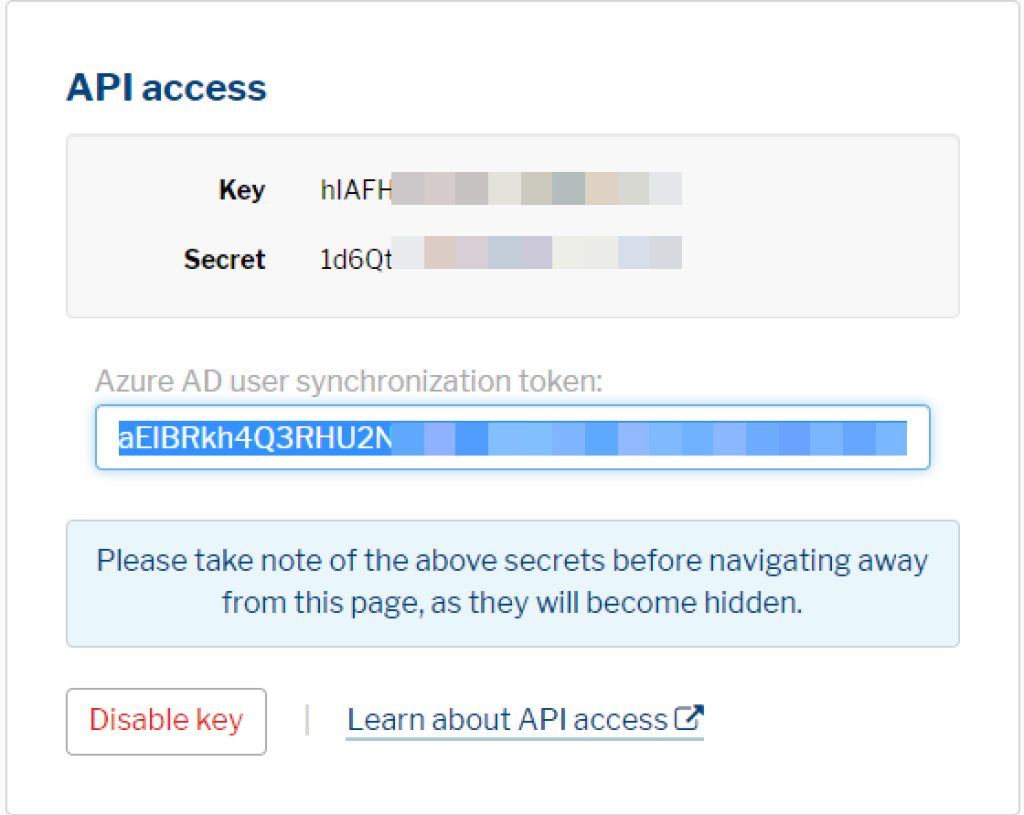
Then, locate the «API access» section, and click «Create API key»:
After completing the previous guide on enabling SSO, you may already have a Secure Practice enterprise application in your Entra ID (previously Azure AD) instance.
You can find it in the Entra ID Admin Portal, in «Enterprise Applications»:
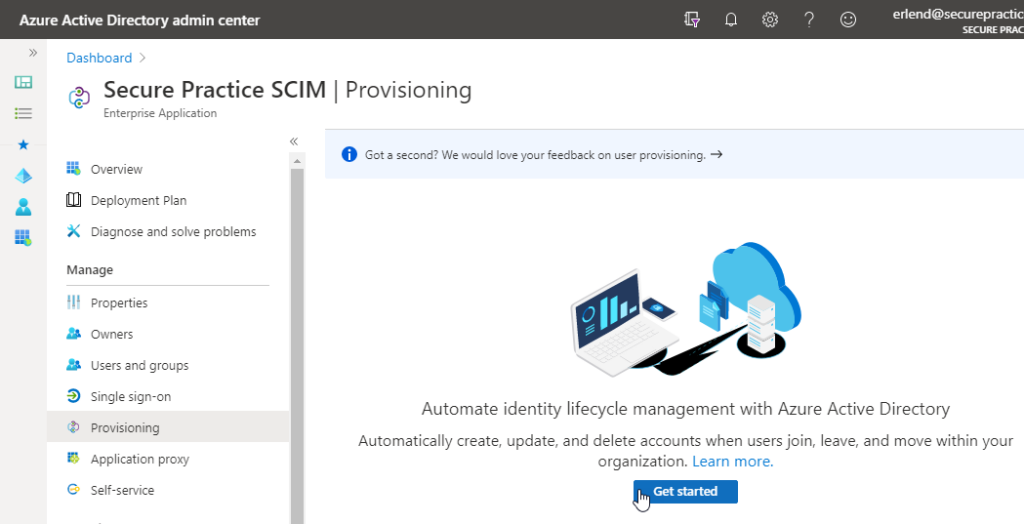
Click the «Secure Practice» application, and then the «Provisioning» tab in the left menu, and then the «Get started» button to continue.
Unable to click the «Get started» button?
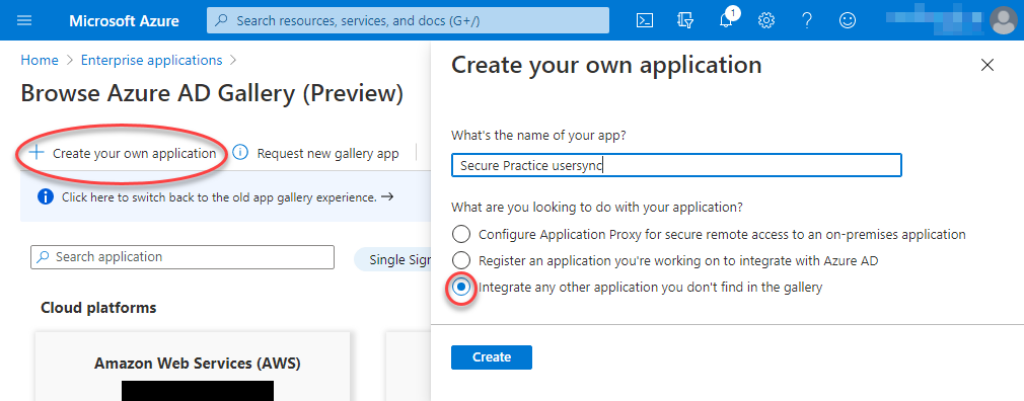
Microsoft Azure may reject user provisioning to be established with existing SSO applications, due to a permission issue with the service principal. In this case, simply create another enterprise application in your directory, because users will not see this provisioning application anywhere. Learn more
Before we begin the provisioning process, we need to define which users should be included in the synchronization scope towards Secure Practice. This may also be updated at any time later.
Click the «Users and groups» tab for your enterprise application.
Add any assignments for groups and/or users to be included, and save.

The next step requires your Secure Practice API key and secret pair for authorizing Microsoft Azure to perform updates on your Secure Practice accounts.
The Azure wizard will need a special token which is a base64 encoded value of the API key and API secret you obtained earlier, joined together by a colon (:).
Generate your base64-encoded secret token here
The secret token is generated privately on your local device.
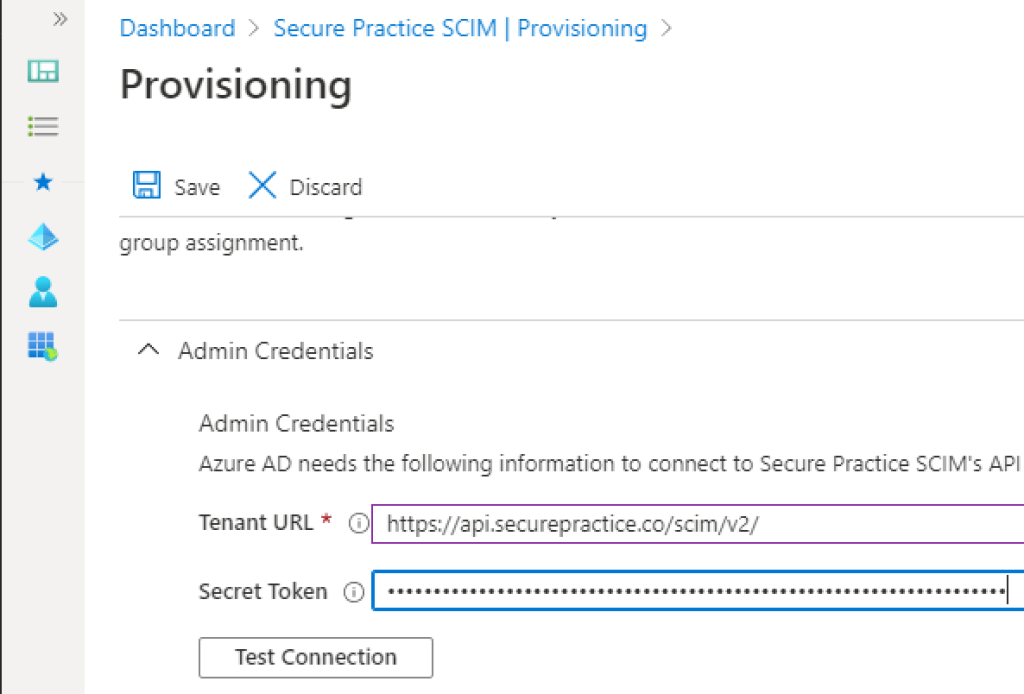
When inside the provisioning wizard, expand the «Admin Credentials» tab:
Input tenant URL (https://api.securepractice.co/scim/v2/), and your secret token:
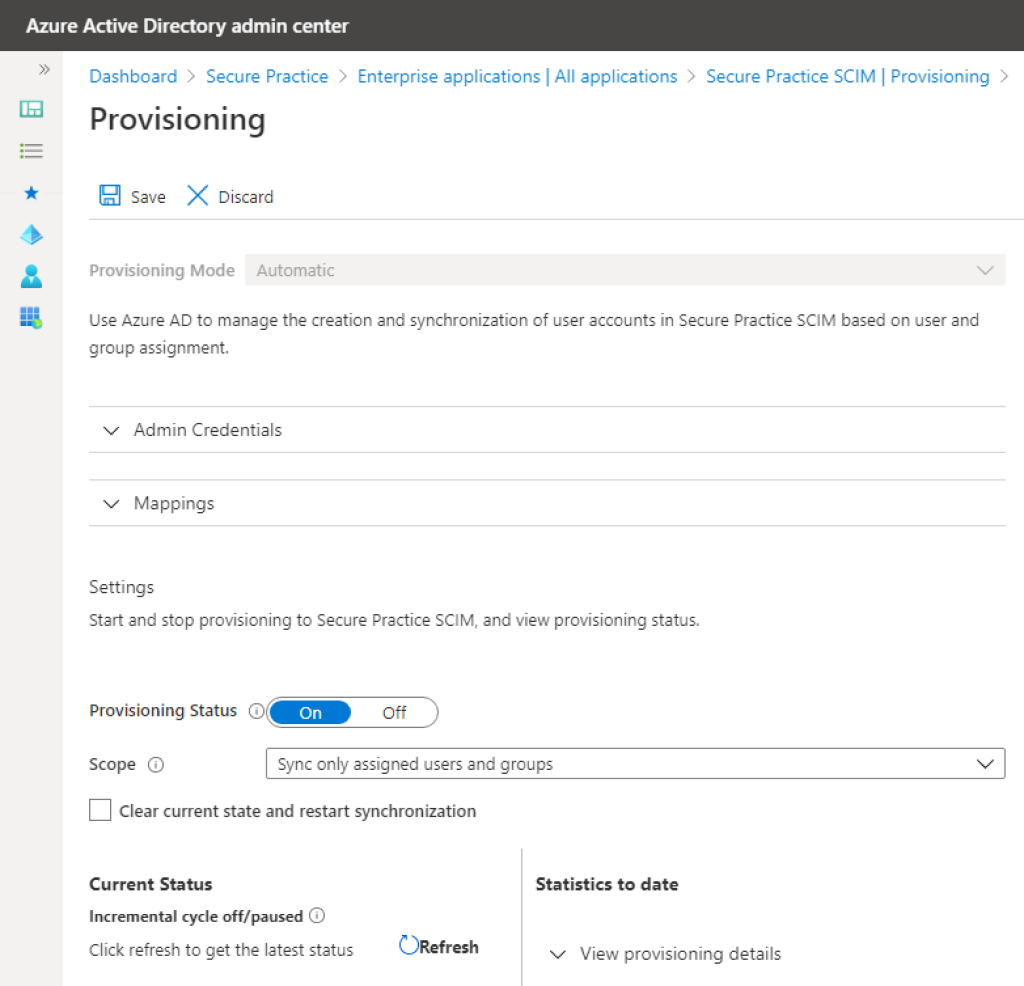
After successfully testing the connection and saving your credentials, the provisioning tab will now reveal that provisioning is disabled by default.
Change the «Provisioning Status» setting to «On».
Select «Selected users and groups» as the desired scope, and save.
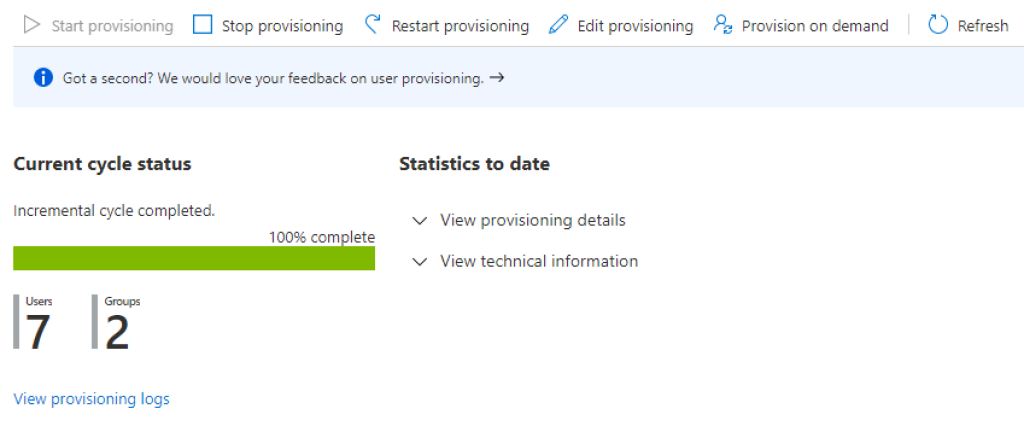
The integration will synchronize whichever users you enable for this application, either directly or through group memberships. Synchronization is not immediate, but happens through periodic intervals at several points in time each day.
Finally, in case you had to create a separate enterprise application for user syncronization, in addition to your SSO application, it could be a good idea to hide the new application from assigned users.
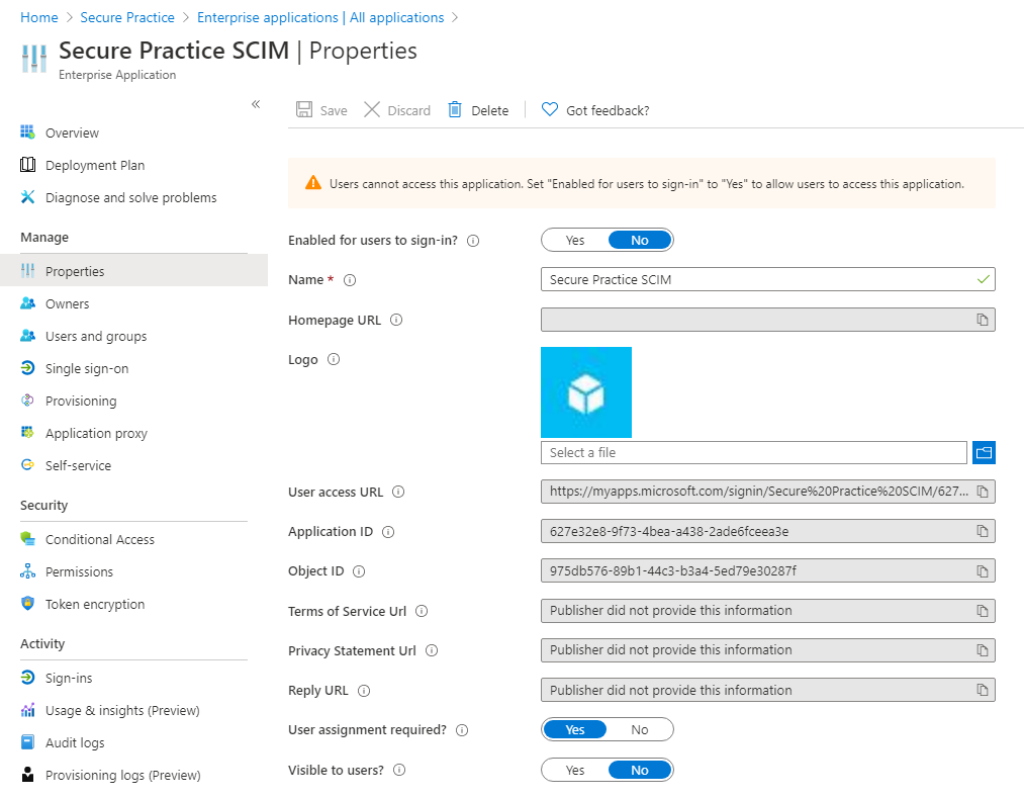
Click the «Properties» tab for your enterprise application.
Disable the «Enable users to sign-in» and «Visible to users» settings, and save.
With this step we conclude the required setup for a basic configuration, however you may keep reading below for configuring more advanced sync scenarios.
Advanced sync scenarios
It may be that your Azure AD instance is populated with data which do not conform with the default sync settings provided by default.
For instance, if your organization chart is reflected with multiple levels in the AD hierarchy. While the field «department» is included already, it may be that you also would like organization and custom attributes for e.g. division to be included in sync.
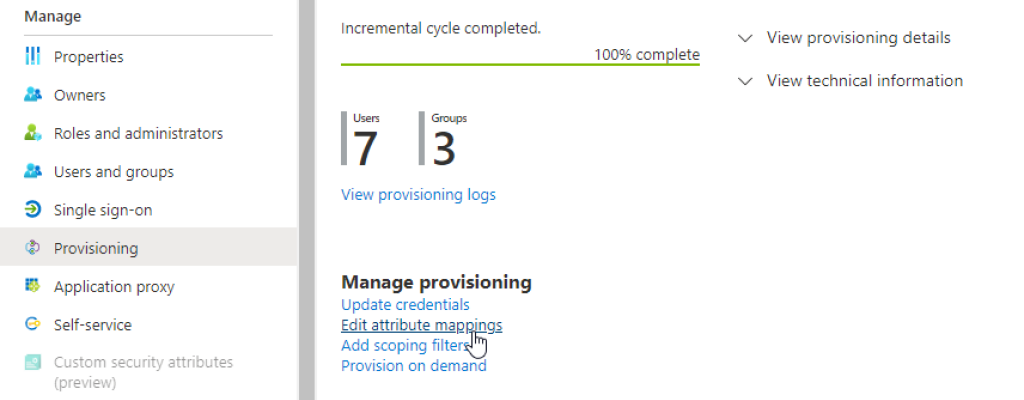
Select «Edit attribute mappings» on the provisioning page to proceed with configuration:
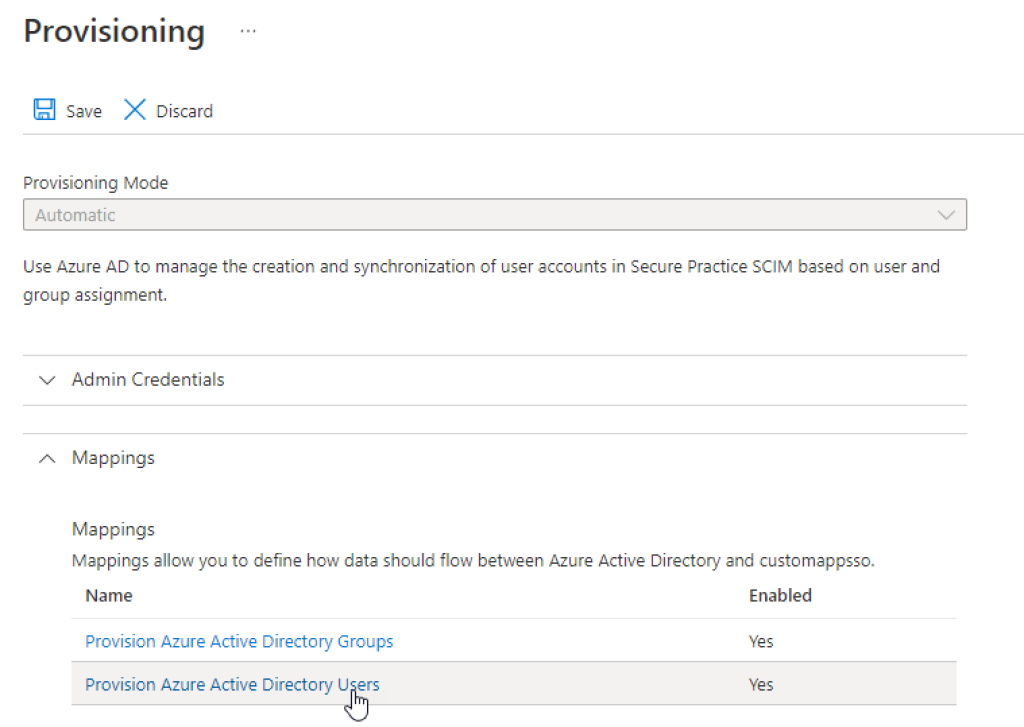
On the next page, expand «Mappings», and select «Provision Azure Active Directory Users»:
Here, you will see a list of attributes which are included from Entra ID in the sync. This is where you can edit or add additional attribute mappings to include, so proceed by clicking «Add new mapping» at the bottom of the list:
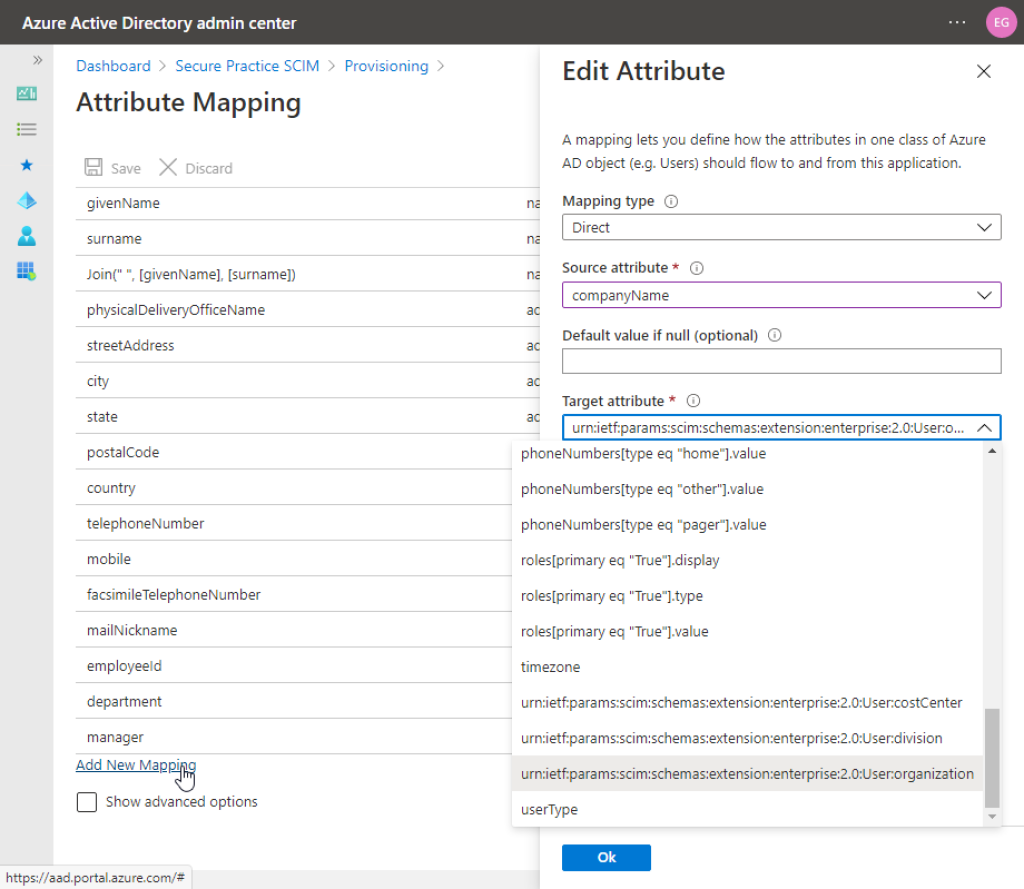
For source attribute, select the Entra ID field which holds the data you want to include, before selecting a target attribute. Source is the name of the field in Entra ID, while target represents a standardized way to name fields in the underlying sync standard.
With target «urn:ietf:params:scim:schemas:extension:enterprise:2.0:User:organization», we can understand your input (e.g. «companyName» as in the example above), represents a level higher up in your organization than «department», which is (usually) already included.
With target «urn:ietf:params:scim:schemas:extension:enterprise:2.0:User:division», you can map a third level in your organization, between organization and department in the hierarcy, or simply above the department attribute if organization is not relevant for you.
Depending on your specific Entra ID configuration, the source attribute may vary for various outputs, including e.g. «extensionAttribute1» or «country», so please verify your own setup.
Moreover, it may be that your department attribute actually contains the entire organization hierarcy above the actual department in only the single «department» field alone, however with the various levels delimited by e.g. a special character like > or |. In these cases, you may check out the «Expression» option for «Mapping type», which allows you to write a query for parsing input to produce output. In this case, you may want to use the same source attribute for multiple organization level unit outputs, however with a slightly adjusted expression to parse each level.
To verify the actual data you are actually syncing, invoke a user sync by demand and review:
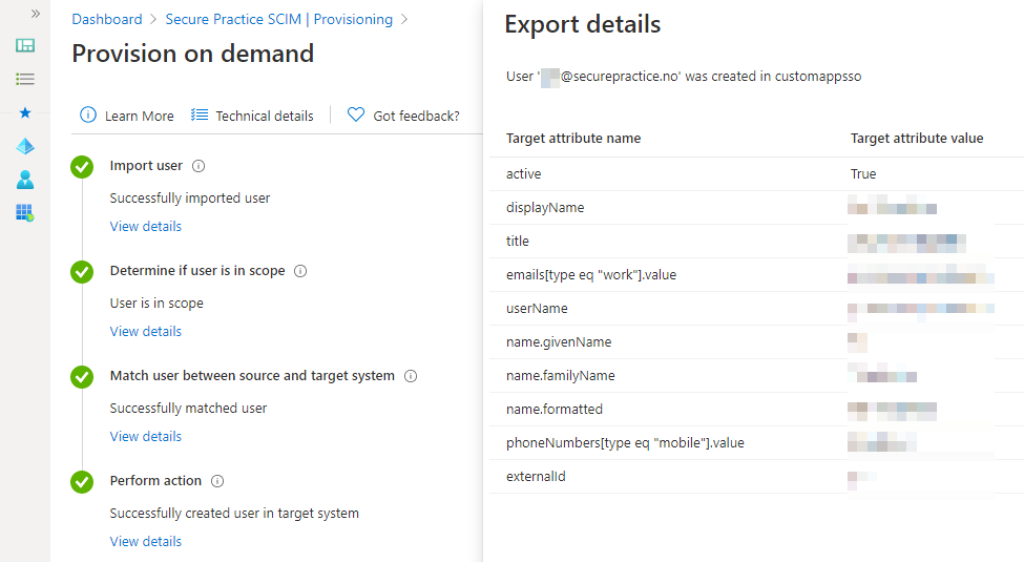
Please note, you can also control whether there are any data in your configuration which should not be synced, such as mobile phone numbers, by configuring the attribute mappings.
Finally, if you make any changes to attribute mappings you may need to restart provisioning for the changes to take effect. This can be done with a simple click on the «Restart provisioning» button in the toolbar at the top of the «Provisioning» page.
We are happy to answer any questions you may have, including on compliance or data protection.