Manually activating the MailRisk add-in
This guide is intended for users who are testing out MailRisk without giving access to other users in the organization.
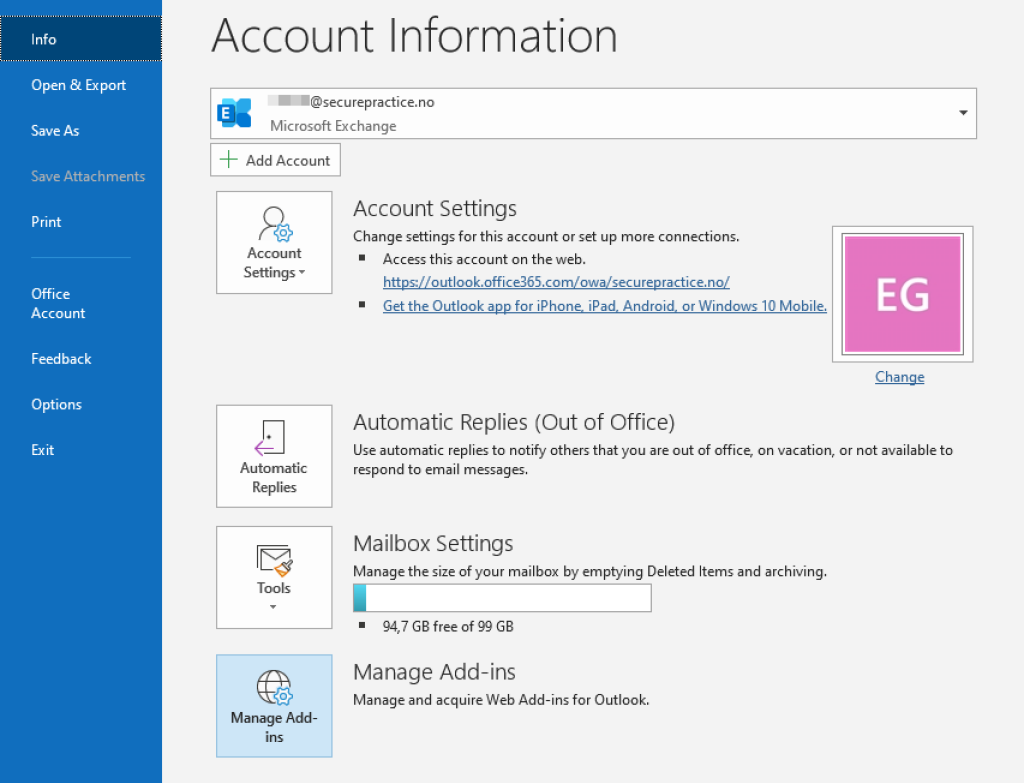
Open Microsoft Outlook, and click «File» in the main menu.
Click the button «Manage add-ins» at the bottom of the screen.
Your web browser will open with your webmail account, and personal settings page for add-ins.
If the MailRisk add-in has already been installed for your organization, but is deactivated by default, you may proceed directly to activate add-in below.
Install manifest file
This part of the guide requires that your user is allowed to manually install add-ins in Microsoft Office.
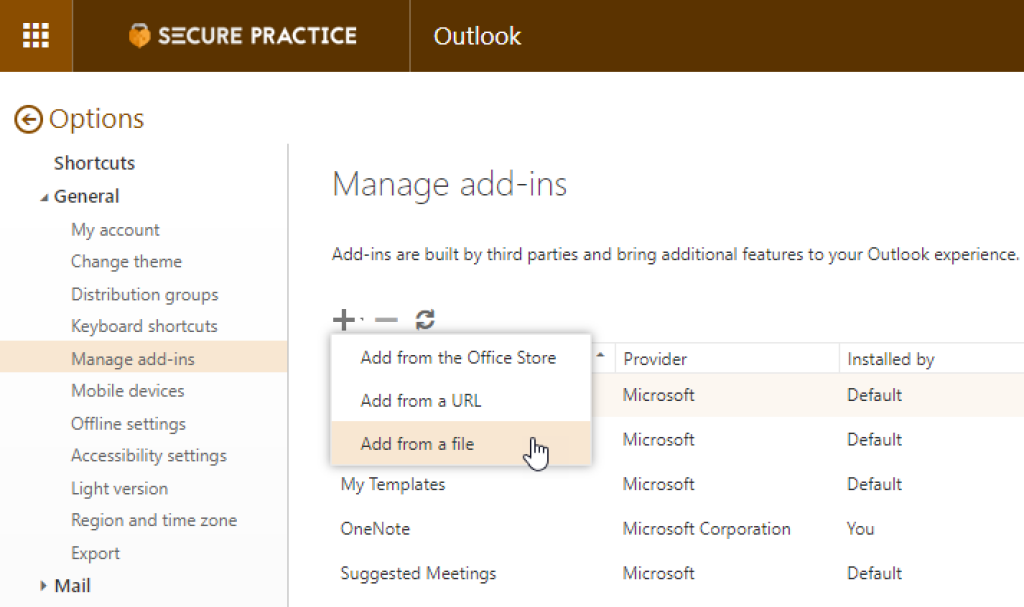
Click the plus button above the list of add-ins, and then «Add from a file»:
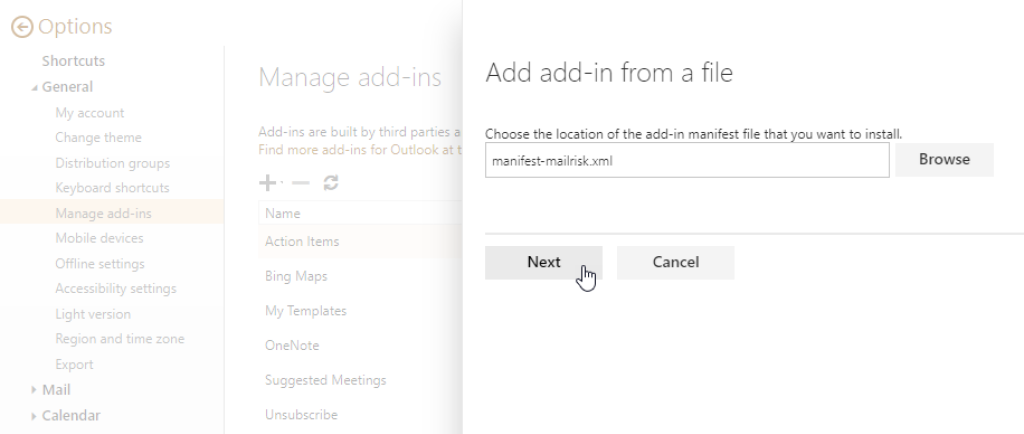
The next step requires you to upload an XML manifest file, which describes the MailRisk add-in to Exchange and Outlook, from your local hard drive.
To obtain the required manifest-file, go to the Secure Practice customer portal https://manage.securepractice.co, and click «Download manifest.xml».
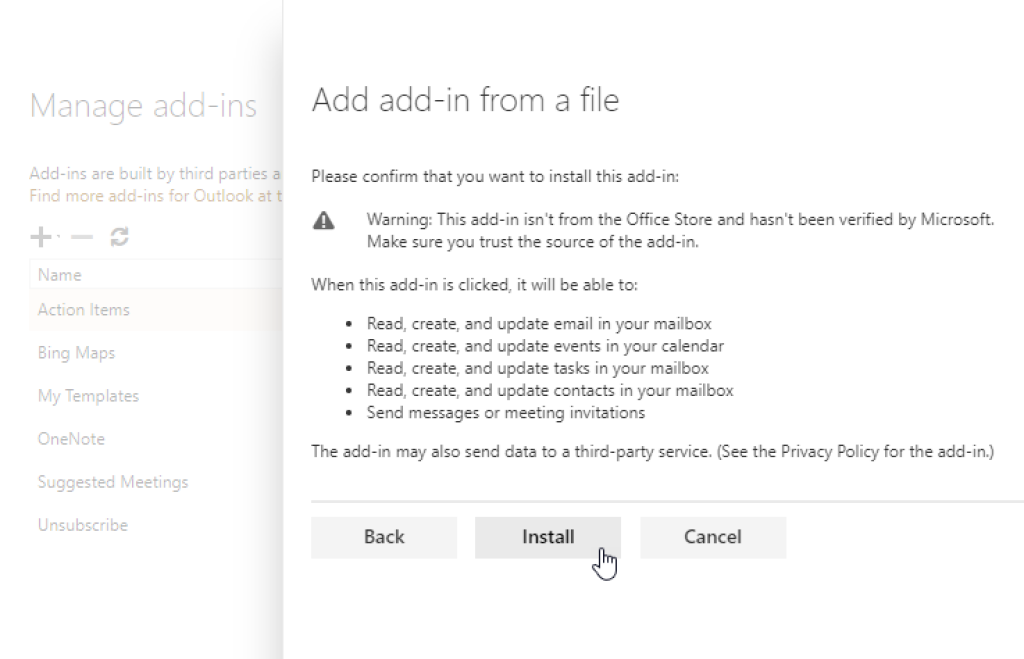
Confirm installation by clicking «Install» in the dialogue:
Activate add-in
Verify that you can find MailRisk in the list of available add-ins.
Ensure that the checkbox at the right «Turned on» is checked for MailRisk:
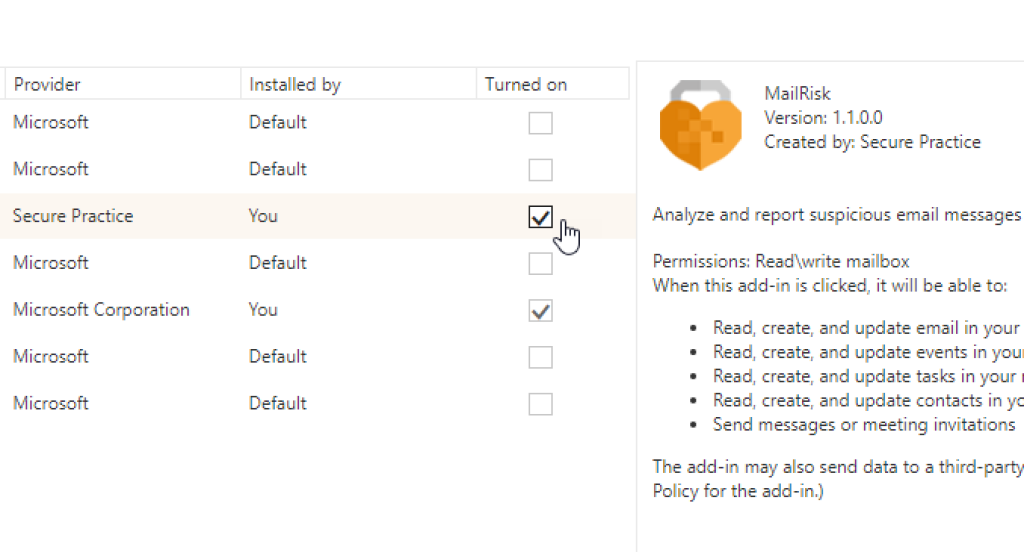
The MailRisk button will soon be visible in your Outlook clients. Please allow for up to 24 hours, but an Outlook app restart may help speeding things up.